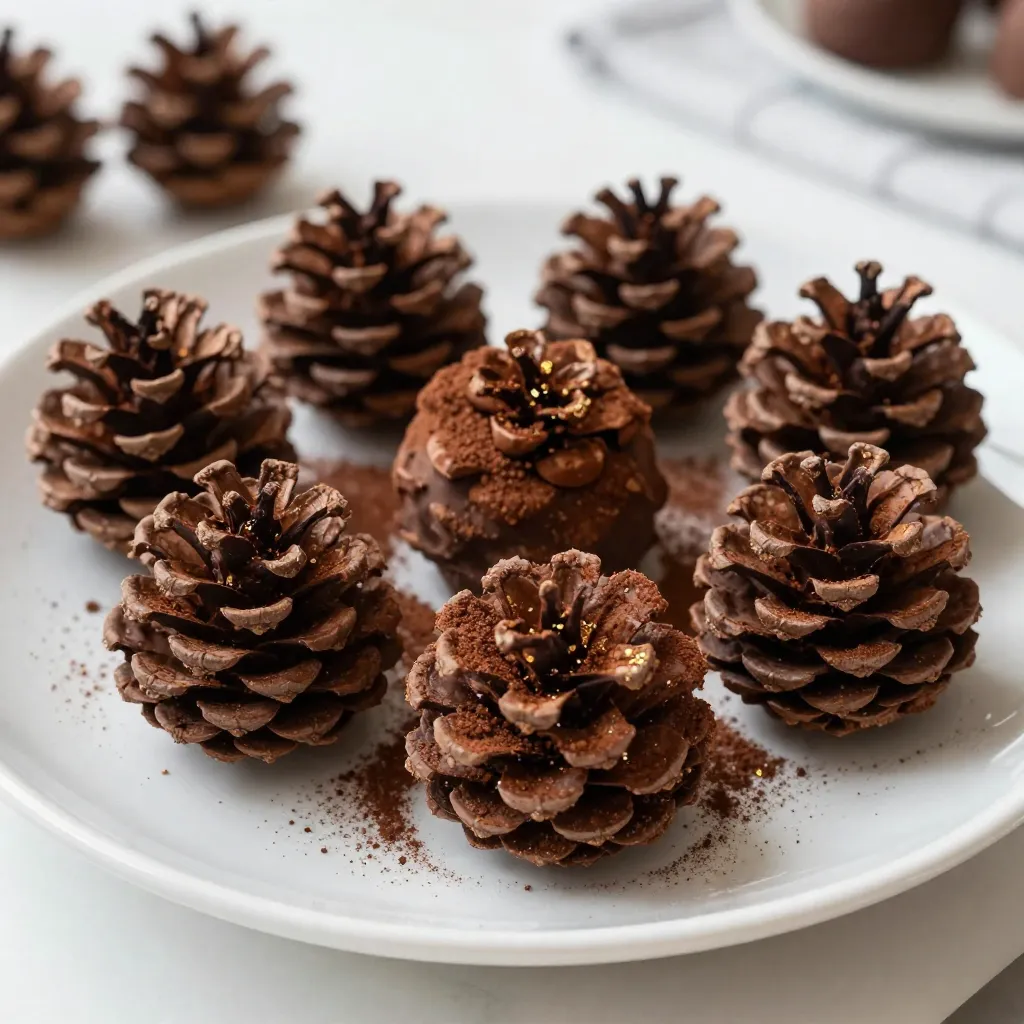
Do you love chocolate? If so, you’ll want to try my Pine Cone Chocolate Truffles! This fun, easy recipe combines rich dark chocolate with delightful textures from nuts and cocoa. Perfect for holiday parties or cozy nights, these truffles look like pine cones but explode with flavor. In this post, I’ll share step-by-step instructions and tips to help you create these treats effortlessly. Let’s get started on this delicious journey!
Why I Love This Recipe
- Rich Chocolate Flavor: These truffles are made with high-quality dark chocolate, giving them a deep, satisfying flavor that chocolate lovers will adore.
- Fun to Make: Rolling the truffles and coating them in nuts is a fun activity, perfect for family gatherings or a cozy night in.
- Beautiful Presentation: The unique pine cone shape and optional gold or silver dust make these truffles visually stunning, ideal for holiday parties.
- Customizable: You can easily swap out the nuts or add different flavors, making these truffles versatile for any occasion.
Ingredients
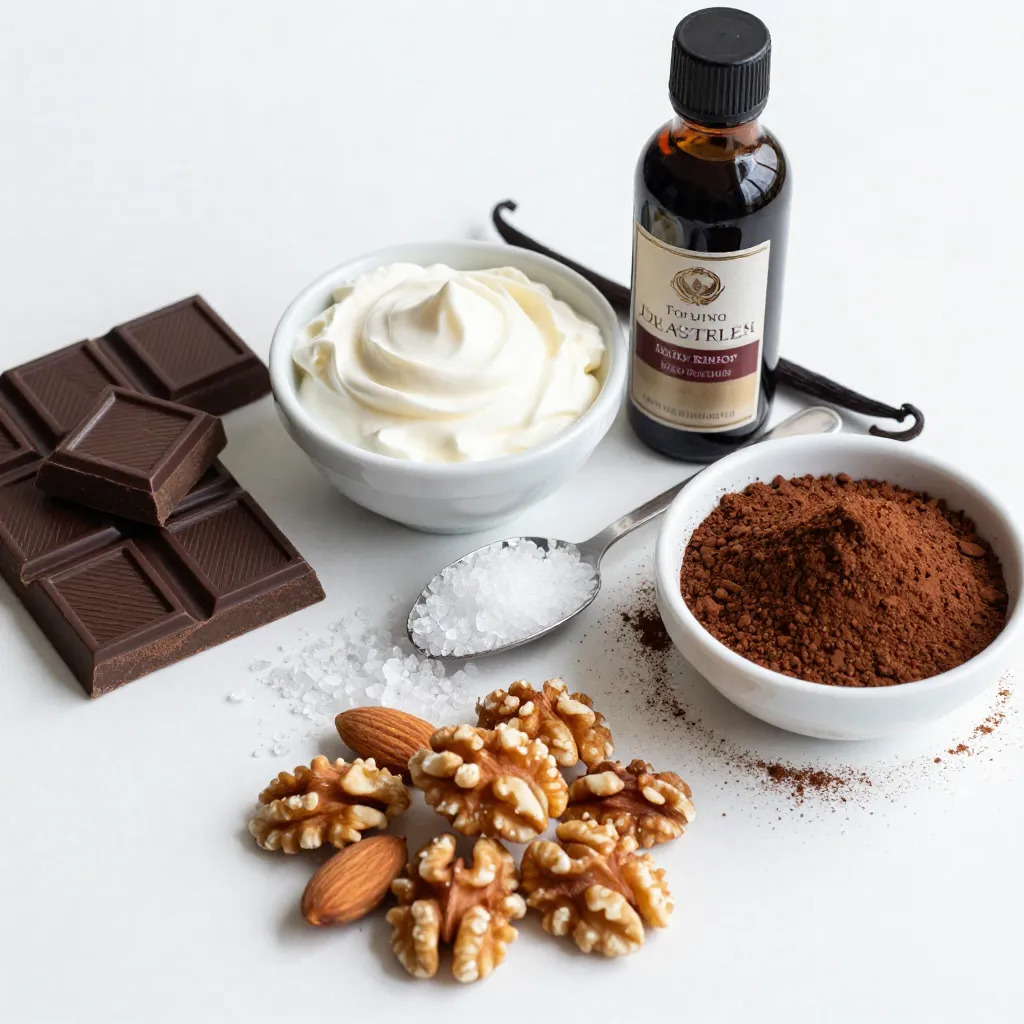
To create Pine Cone Chocolate Truffles, gather the following ingredients:
– 8 ounces dark chocolate (70% cocoa), chopped
– 1/2 cup heavy cream
– 1 teaspoon vanilla extract
– 1/4 teaspoon sea salt
– 1/2 cup finely crushed almonds or walnuts (for pine cone texture)
– 1/4 cup unsweetened cocoa powder (for dusting)
– Edible gold or silver dust (optional, for decoration)
These ingredients come together to make rich and delicious truffles. The dark chocolate gives a deep flavor, while the heavy cream adds creaminess. Vanilla and sea salt enhance the taste. The crushed nuts create that fun pine cone look. Finally, cocoa powder and optional edible dust add flair.
Make sure to use high-quality chocolate for the best taste. Feel free to adjust the nuts based on your preference. This recipe is simple yet rewarding. You will impress everyone with your homemade treats!
Step-by-Step Instructions
Melting the Chocolate
To melt the chocolate, use a double boiler method. Place a heatproof bowl over a pot of simmering water. Make sure the bowl does not touch the water. Add chopped dark chocolate and heavy cream to the bowl. Stir slowly until the chocolate melts and becomes smooth. This step is crucial. It ensures a creamy texture that binds the truffles.
Adding Flavor
Once the chocolate is melted, take it off the heat. Add one teaspoon of vanilla extract and a quarter teaspoon of sea salt. Stir well to mix everything together. This will give your truffles a rich flavor that people will love.
Chilling the Mixture
Next, let the chocolate mixture cool to room temperature. Once it cools, cover the bowl with plastic wrap. Place it in the refrigerator for about two hours. This chilling will help firm the mixture, making it easier to scoop and shape later.
Shaping the Truffles
After chilling, use a small scoop or your hands to take about a tablespoon of the mixture. Roll it into a ball. Aim for a rustic look, similar to a pine cone. The uneven shape adds to the charm of each truffle.
Coating the Truffles
Next, roll each chocolate ball in finely crushed nuts. You can use almonds or walnuts for this step. The crushed nuts will create a great texture, mimicking the look of pine cones. Make sure each truffle is well-coated.
Dusting and Decorating
For extra flavor and a nice finish, dust each truffle with unsweetened cocoa powder. Use a light hand to get an even coat. If you want to make it special, you can add edible gold or silver dust. This will give your truffles an elegant shine.
Final Chilling
Finally, place the truffles on a parchment-lined tray. Refrigerate them for another 30 minutes. This final chilling is important. It helps the truffles hold their shape and makes them perfect for serving.
Tips & Tricks
Achieving the Perfect Shape
To mimic a pine cone look, shape the truffles by rolling them into a rustic form. Use your hands for a more organic shape. If you want extra help, a small scoop can make the process easier. Aim for uneven edges to add to the pine cone vibe.
Flavor Enhancements
For a twist, try adding a teaspoon of espresso powder. It gives a nice coffee flavor to the truffles. You can also play with different types of chocolate. Dark chocolate gives a rich taste, while milk chocolate offers a sweeter note. Each choice changes the flavor profile.
Serving Suggestions
Present the truffles on a festive plate to impress your guests. Set them in a pine cone shape for a fun touch. You can also add fresh pine needles or a sprinkle of powdered sugar to mimic snow. For drinks, pair the truffles with a nice red wine or hot cocoa. It creates a cozy treat for any gathering.
Pro Tips
- Quality Chocolate Matters: Use high-quality dark chocolate to enhance the flavor of your truffles. The better the chocolate, the richer the taste!
- Chill Time is Key: Allow the chocolate mixture to chill thoroughly to make shaping the truffles easier. If the mixture is too soft, it will not hold its shape.
- Experiment with Coatings: Try using different nuts or even crushed cookies for a unique texture. You can also roll the truffles in shredded coconut for a tropical twist.
- Presentation Matters: Arrange the truffles creatively on a platter. Use decorative elements like fresh pine needles or festive ribbons to enhance the visual appeal.
Variations
Alternative Coatings
You can change the look and taste of your pine cone chocolate truffles by using different nuts. Try pecans, hazelnuts, or even pistachios for unique flavors. You can also add colorful sprinkles for fun. For a twist, use flavor-infused coatings like matcha powder or shredded coconut. Both options give your truffles a new taste and fun texture.
Dietary Modifications
If you want to make these truffles vegan, swap the heavy cream for coconut cream. Use dairy-free chocolate too. For a gluten-free version, ensure your nuts and cocoa powder are certified gluten-free. These changes let everyone enjoy your delicious truffles without worry.
Seasonal Variations
To make your truffles feel festive, add spices for winter flavors. A pinch of cinnamon or nutmeg gives a warm taste. For other holidays, decorate with colored icing or seasonal sprinkles. You can even shape them like small hearts or stars for Valentine’s Day or Christmas. These small changes make your truffles perfect for any occasion.
Storage Info
Best Practices for Storing Truffles
To keep your pine cone chocolate truffles fresh, store them in the fridge. Place them in an airtight container. This helps prevent them from drying out or absorbing odors. If you want to freeze them, use a freezer-safe container. They can last up to three months in the freezer. Just remember to let them thaw in the fridge before enjoying!
Shelf Life
Homemade truffles can last about one week in the fridge. If you store them properly, they maintain their great taste and texture. However, for the best flavor, enjoy them within the first few days. The longer they sit, the more they lose their charm.
Recommendations for Pre-Made Options
If you prefer to buy pre-made pine cone chocolate truffles, check local gourmet stores or bakeries. Many shops offer seasonal treats, especially around the holidays. You can also search online for specialty shops that deliver.
FAQs
How do I ensure truffles hold their shape?
To keep your truffles firm, start with cold hands. Warm hands melt chocolate. Chill the chocolate mixture well before shaping. After rolling, place them back in the fridge. This helps them firm up. Avoid leaving them out too long. Serve them chilled for the best shape.
Can I make these truffles in advance?
Yes, you can make these truffles ahead of time. Prepare the truffles and chill them. Store them in an airtight container in the fridge. They stay fresh for up to two weeks. Just remember to dust with cocoa right before serving for the best look.
What other flavors can I try for chocolate truffles?
You can try many flavors! Here are some ideas:
– Add espresso powder for a coffee kick.
– Mix in orange zest for a citrus twist.
– Use peppermint extract for a minty flavor.
– Try almond or hazelnut liqueur for a nutty touch.
Experimenting can lead to fun new tastes!
Can children help make these truffles?
Yes, kids can definitely help! They can scoop the chocolate and roll the truffles. Make sure they wash their hands first. Keep sharp tools and hot surfaces away from them. Supervise closely during the process. It makes a great family activity!
You’ve learned the key steps to make delicious chocolate truffles. From selecting the right ingredients to perfecting your technique, every detail counts. Experiment with flavors and coatings to express your creativity. Remember to chill your truffles well for the best texture. With these tips, you can impress friends or treat yourself. So, gather your ingredients and start crafting your sweet creations. Enjoy the process as much as the tasty result