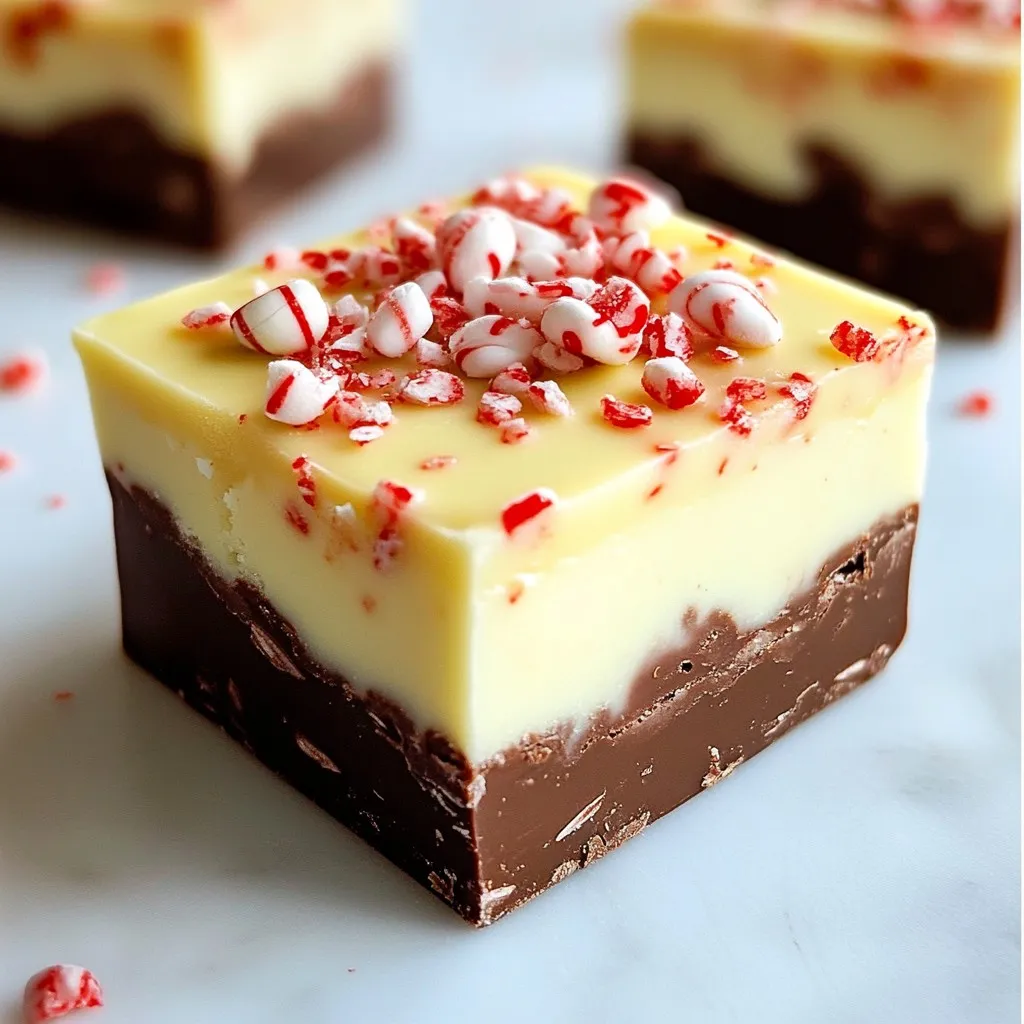
Get ready to spread some holiday cheer with my Peppermint Christmas Fudge! This easy and delicious treat combines rich chocolate and refreshing peppermint for a sweet twist you’ll love. Whether for gift-giving or festive snacking, this fudge is perfect for everyone. In just a few simple steps, you can create this delightful dessert that will light up your holiday season. Let’s dive into the sweet magic of peppermint fudge!
Why I Love This Recipe
- Festive Flavor: This fudge combines the classic taste of chocolate with refreshing peppermint, making it a perfect treat for the holiday season.
- Quick and Easy: With a prep time of just 15 minutes, this recipe is perfect for holiday gatherings when you need a delicious dessert in a hurry.
- Customizable: Feel free to add your own twist with different types of chocolate or toppings, allowing you to create a unique fudge that suits your taste.
- Great for Gifting: Cut into squares and packaged nicely, this fudge makes an excellent homemade gift for friends and family during the festive season.
Ingredients
List of Ingredients
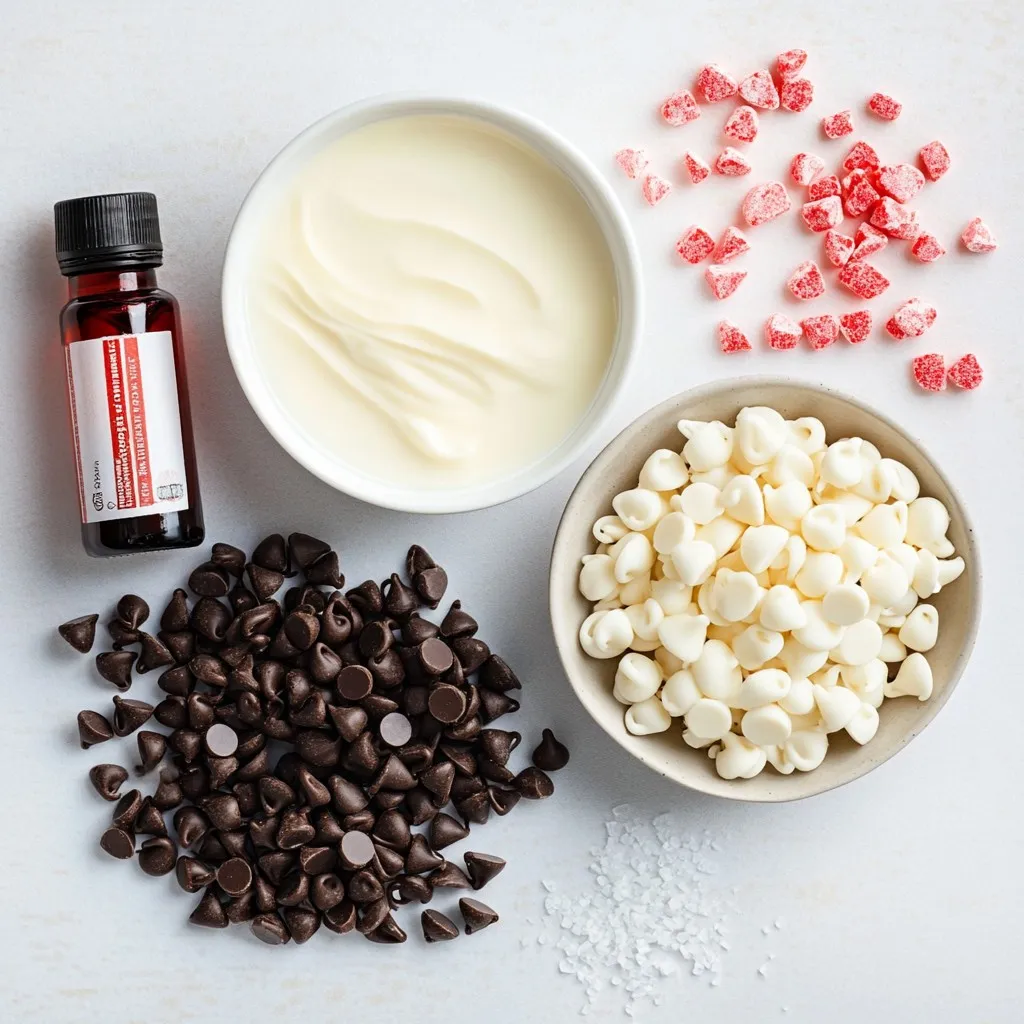
– 2 cups semi-sweet chocolate chips
– 1 cup sweetened condensed milk
– 1 cup white chocolate chips
– 1 teaspoon peppermint extract
– 1/2 cup crushed peppermint candies
– 1/4 teaspoon salt
– Optional: red food coloring
To make peppermint Christmas fudge, gather these simple ingredients. Each one plays a vital role in creating a delightful treat. The semi-sweet chocolate chips give it a rich base, while the white chocolate adds a creamy top. Sweetened condensed milk helps bind everything together, making the fudge smooth and sweet.
Peppermint extract brings that classic holiday flavor. Crushed peppermint candies add a fun crunch and a pop of color. The salt balances the sweetness, enhancing the overall taste. If you want a festive look, red food coloring can create a marbled effect.
This list keeps the recipe easy. You can find all these ingredients at your local store. Always choose high-quality chocolate for the best flavor. Fresh peppermint candies will give a nice crunch and bright taste.
Now that you have your ingredients ready, you can move on to the next steps for making this sweet treat!
Step-by-Step Instructions
Preparing the Baking Dish
– Line the pan with parchment paper.
– Allow parchment overhang for easy removal.
To start, grab an 8×8 inch baking pan. I like to use parchment paper because it makes removing the fudge so easy. Just lay the paper flat, letting it hang over the edges. This overhang acts like a handle when you want to lift out the fudge later.
Melting the Semi-Sweet Chocolate
– Combine ingredients in a saucepan.
– Stir until melted and smooth.
Next, take a medium saucepan. In it, mix 2 cups of semi-sweet chocolate chips, 1 cup of sweetened condensed milk, and 1/4 teaspoon of salt. Heat this over low heat. Keep stirring constantly. This will help prevent the chocolate from burning. When it is melted and smooth, take it off the heat.
Adding Flavors and Layers
– Mix in peppermint extract.
– Pour chocolate mixture into the baking dish.
– Prepare white chocolate layer.
Now, stir in 1 teaspoon of peppermint extract. This gives the fudge its holiday flavor. If you want a fun look, add a few drops of red food coloring to the mix. Then, pour this melted chocolate into the prepared baking dish. Spread it evenly with a spatula.
For the next layer, melt 1 cup of white chocolate chips in the same saucepan. Stir until it is smooth.
Finalizing the Fudge
– Spread white chocolate mixture over the semi-sweet layer.
– Sprinkle with crushed peppermint candies.
– Chill and cut into squares.
After the white chocolate is melted, take it off the heat. Stir in 1/2 cup of crushed peppermint candies for a nice crunch. Then, pour this mixture over the semi-sweet layer in the baking dish. Again, use a spatula to spread it evenly.
To make it festive, sprinkle more crushed peppermint candies on top. Now, place the baking dish in the refrigerator. Let it chill for at least 2 hours until the fudge is firm. Once it’s set, use the paper overhang to lift it out. Cut it into squares and enjoy your tasty treat!
Tips & Tricks
Achieving the Perfect Texture
To make great fudge, stir constantly while melting. This keeps the chocolate smooth and creamy. If you stop stirring, the chocolate may clump. After you mix in all the ingredients, chill the fudge for at least two hours. This helps it set properly. If you skip this step, your fudge may be too soft and not hold its shape.
Enhancing Flavor and Presentation
Using high-quality chocolate chips makes a big difference. They melt better and taste richer. Look for brands that you enjoy eating on their own. For a festive touch, add edible glitter on top. It sparkles and makes your fudge look special. You can also use whole peppermint candies as decoration. This adds color and a fun twist to your holiday treat.
Pro Tips
- Use Quality Chocolate: For the best flavor, choose high-quality chocolate chips. They melt better and enhance the overall taste of your fudge.
- Cool Gradually: Let the fudge cool at room temperature before chilling in the refrigerator. This helps in achieving a smoother texture.
- Experiment with Flavors: Try adding different extracts, like vanilla or almond, for a unique twist on the classic peppermint flavor.
- Storage Tips: Store the fudge in an airtight container at room temperature or in the fridge to keep it fresh for longer.
Variations
Flavor Customizations
You can have fun with flavors in your fudge! Try different extracts to change the taste. Here are some ideas:
– Vanilla extract gives a warm, classic flavor.
– Almond extract adds a sweet, nutty twist.
You might also want to add extra texture. Consider mixing in:
– Chopped nuts like walnuts or pecans.
– Dried fruit such as cranberries or cherries.
These little changes can make your fudge unique and tasty!
Dietary Modifications
If you want to make your fudge fit different diets, it’s easy! Here are some ideas:
– For a vegan version, use dairy-free chocolate instead of regular chocolate.
– You can also find sugar-free chocolate to make a healthier treat.
These swaps make the fudge more inclusive for everyone to enjoy!
Storage Info
Best Practices for Storing Fudge
To keep your fudge fresh, always use an airtight container. This helps seal in moisture and flavor. Place parchment paper between layers of fudge to prevent sticking. Homemade fudge lasts about two weeks in the fridge. If you want it to last longer, consider freezing it.
Freezing Tips
To freeze fudge, wrap each piece in plastic wrap. Then, place the wrapped fudge in a freezer-safe bag. Make sure to remove as much air as possible. This prevents freezer burn and keeps it tasty. When you’re ready to enjoy it, take the fudge out of the freezer. Let it thaw in the fridge overnight for the best flavor.
FAQs
How long does peppermint fudge last?
Peppermint fudge can last up to a week in the fridge. Store it in an airtight container. If you freeze it, it stays good for about three months. Just wrap it well to keep it fresh.
Can I use milk chocolate instead of semi-sweet?
Yes, you can use milk chocolate. This will make the fudge sweeter and creamier. The flavor will shift from rich to more sugary, changing the taste.
What can I substitute for sweetened condensed milk?
You can use coconut milk or almond milk mixed with sugar for a dairy-free option. You may also use evaporated milk with added sugar for a similar texture.
How do I prevent fudge from being too soft?
To avoid soft fudge, ensure you melt chocolate on low heat. Stir constantly and chill it for the full two hours. If it’s still soft, try adding a bit more chocolate next time.
In this post, we covered the essential ingredients and steps to make delicious peppermint fudge. The guide included tips for achieving the right texture and flavor. You learned about variations to customize your fudge for different diets. Store your fudge properly to keep it fresh and tasty. With these easy methods, you can create delightful treats for yourself and loved ones. Enjoy experimenting in the kitchen, and don’t forget to share your tasty result