Craving a sweet treat without the fuss of baking? Look no further! These no-bake peanut butter bars are easy, quick, and downright delicious. With just a handful of simple ingredients, you can whip up a batch that satisfies your sweet tooth and fuels your day. Let’s dive in and create a snack that you’ll love to share (or keep all to yourself). Grab your mixing bowl, and let’s get started!
Why I Love This Recipe
- Simple to Make: This no-bake recipe requires minimal ingredients and takes just 10 minutes to prepare, making it perfect for busy days.
- Deliciously Nutritious: Packed with wholesome ingredients like oats and peanut butter, these bars provide a good source of energy and protein.
- Customizable: You can easily tweak the recipe by adding your favorite mix-ins, such as dried fruits or nuts, to suit your taste preferences.
- Great for Meal Prep: These bars can be made ahead of time and stored in the fridge, making them a convenient snack option for the week.
Ingredients
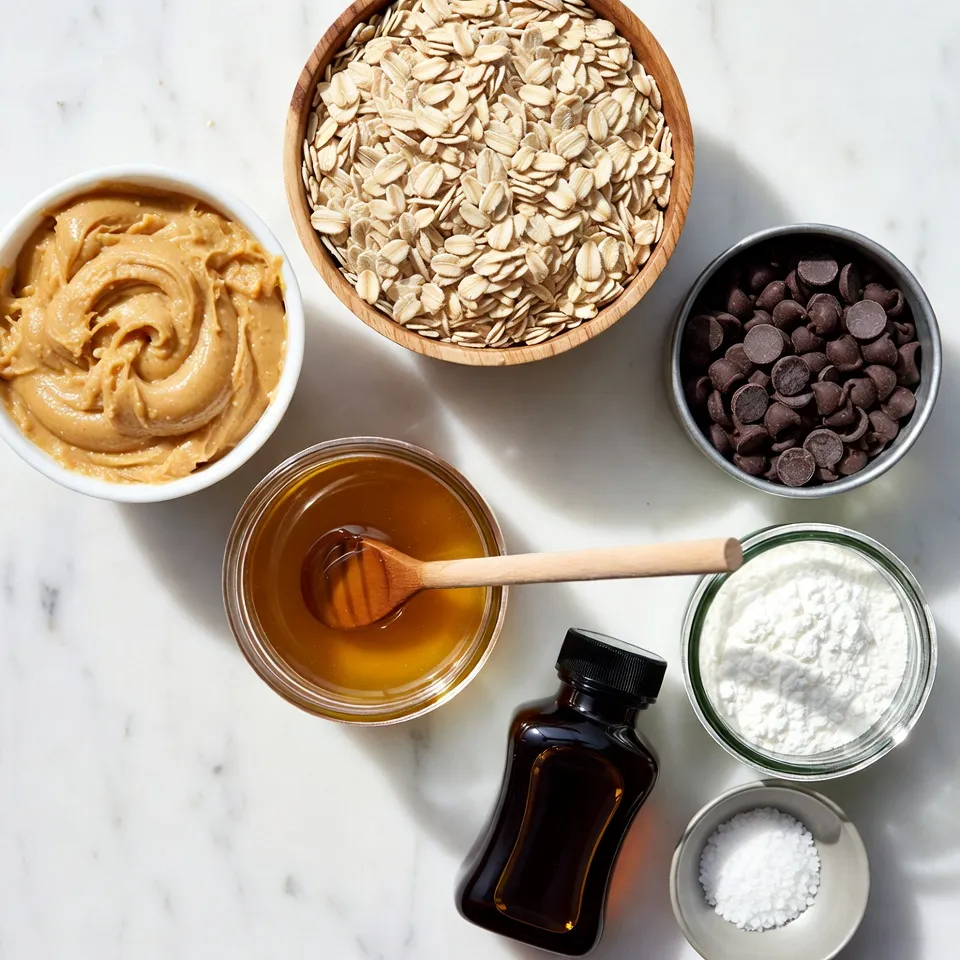
List of Ingredients
– 1 cup creamy peanut butter
– 1/2 cup honey or maple syrup
– 2 cups rolled oats
– 1/2 cup chocolate chips (dark or milk)
– 1/4 cup powdered sugar (optional)
– 1/2 teaspoon vanilla extract
– Pinch of salt
The main stars of this recipe are creamy peanut butter and honey or maple syrup. These two ingredients create a rich, sweet base. I love how peanut butter packs protein and flavor. The honey or maple syrup adds a nice sweetness and helps bind the bars.
Next, we have rolled oats. They give the bars texture and make them filling. The chocolate chips add a delightful touch of sweetness. You can use dark or milk chocolate based on your taste. If you want extra sweetness, you can add powdered sugar.
Don’t forget the vanilla extract and a pinch of salt. The vanilla adds warmth, while the salt enhances all the flavors.
Optional Add-ins
– Nuts or seeds
– Dried fruits
Feel free to get creative! You can mix in nuts or seeds for crunch. Dried fruits can add sweetness and chewiness. Both options make your bars even more exciting.
Ingredient Substitutions
– Alternatives for honey/maple syrup
– Vegan options
If you want a different sweetener, you can try agave nectar or coconut nectar. For a vegan option, ensure your chocolate chips are dairy-free. This way, everyone can enjoy these tasty bars!
Step-by-Step Instructions
Preparation Steps
1. Mixing peanut butter and honey
Start with a large bowl. Add 1 cup of creamy peanut butter. Pour in 1/2 cup of honey or maple syrup. Stir these two together until they blend into a smooth mix. This mix is the base of your bars.
2. Adding dry ingredients
Next, add 2 cups of rolled oats. Sprinkle in 1/2 cup of chocolate chips, 1/4 cup of powdered sugar (if you want it sweeter), 1/2 teaspoon of vanilla extract, and a pinch of salt. Mix it all well. You should have a thick, sticky mixture.
Setting the Bars
1. Lining the baking dish
Grab an 8×8 inch square baking dish. Line it with parchment paper. Let some paper hang over the edges. This makes it easier to lift the bars out later.
2. Pressing the mixture
Now, take your mixture and put it into the lined dish. Use a spatula or your hands to press it down. Make sure it is even and smooth on top.
Chilling Instructions
1. Refrigerator vs. freezer settings
Place your dish in the refrigerator. Let it chill for at least 2 hours. If you’re in a hurry, you can put it in the freezer for about 30-45 minutes instead.
2. Checking for proper set
After chilling, check if your bars are firm. They should hold their shape when you lift them out. Use the parchment paper to remove them from the dish. Now, it’s time to cut them into bars or squares!
Tips & Tricks
Achieving the Perfect Consistency
To get the right texture for your bars, stir the peanut butter and honey well. This step helps blend them into a smooth mix. When you add rolled oats and other ingredients, mix until everything sticks together. If your bars are too crumbly, try adding a bit more honey or peanut butter. This will help bind the mix better and keep it from falling apart.
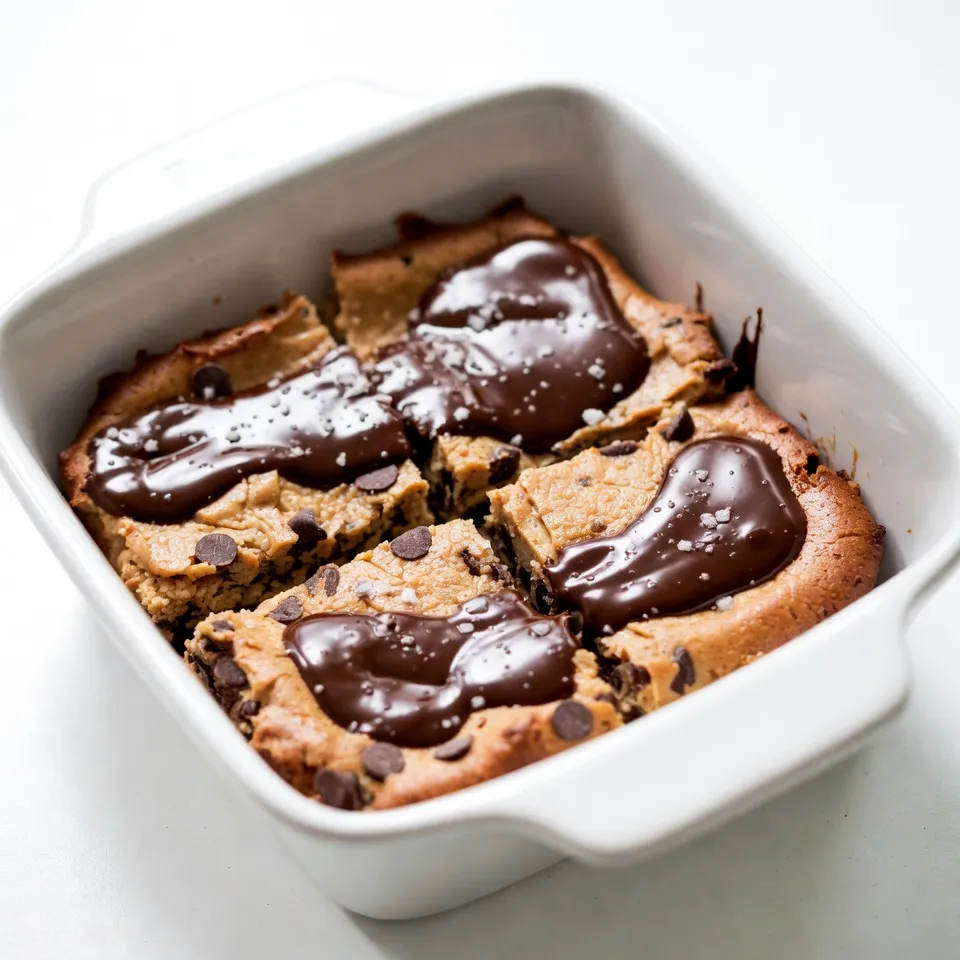
Presentation Tips
Drizzling melted chocolate makes your bars look fancy. You can use either dark or milk chocolate, depending on your taste. Just melt the chocolate and pour it over the top. For an extra touch, sprinkle some sea salt on top. It brings out the sweet flavor and looks great. Serve the bars on a rustic wooden board for a charming display.
Serving Suggestions
These bars pair well with milk or coffee. They make a great snack for afternoon tea or a quick breakfast. You can serve them at parties or family gatherings. They are easy to share and everyone will love them.
Pro Tips
- Use Natural Peanut Butter: Opt for natural peanut butter without added sugars or oils for a healthier option that maintains the authentic peanut flavor.
- Experiment with Sweeteners: Feel free to adjust the sweetness by using different sweeteners like agave syrup or coconut nectar for unique flavor profiles.
- Add Crunch: For an extra crunch, mix in some chopped nuts or seeds along with the chocolate chips to enhance texture and flavor.
- Store Properly: To keep your bars fresh, wrap them individually in parchment paper and store them in an airtight container in the fridge.
Variations
Flavor Variations
You can change the flavor of your bars easily. Adding cocoa powder gives them a rich chocolate taste. Just mix in about 1/4 cup of cocoa powder with your dry ingredients. If you prefer nutty flavors, try using different nut butters, like almond or cashew butter. These choices create unique twists on the classic recipe.
Dietary Variations
If you need gluten-free options, use gluten-free oats. They work just like regular oats. To make low-sugar bars, reduce or skip the powdered sugar. You can also swap honey for a sugar-free syrup. These adjustments keep the bars tasty but lighter in sugar.
Seasonal Variations
You can make these bars fun for the seasons. For holidays, add festive items like chopped dried cranberries or mini marshmallows. In summer, top the bars with fresh fruit like strawberries or blueberries. These seasonal touches make your no-bake bars special and exciting.
Storage Info
Best Storage Practices
To keep your no-bake peanut butter bars fresh, store them in an airtight container. This will help lock in moisture and flavor. Choose a container that fits snugly to avoid air exposure. The ideal storage temperature is in the fridge. Keeping them cold helps maintain their texture and taste.
Shelf Life
In the fridge, these bars last up to two weeks. If you want to save them longer, you can freeze them. They will stay good in the freezer for about three months. Make sure to cut them into bars before freezing. Wrap each bar in plastic wrap to keep them fresh.
Signs of Spoilage
Check for changes in smell or texture. If the bars smell off or feel sticky, they may be bad. Look for any discoloration, too. If you see mold, do not eat them. Always use your best judgment when deciding to eat leftovers.
FAQs
How long do No-Bake Peanut Butter Bars last?
No-Bake Peanut Butter Bars last up to two weeks in the fridge. Store them in an airtight container to keep them fresh. If you want longer storage, you can freeze them. They will stay good for about three months in the freezer. Just remember to wrap them well!
Can I use crunchy peanut butter?
Yes, you can use crunchy peanut butter! It adds a nice texture to the bars. The crunch will give you a fun twist. Just swap it out for the creamy kind in the recipe. Your bars will still be tasty and satisfying.
What can I substitute for oats?
You can use ground flaxseed or crushed nuts as a substitute for oats. Both options work well. If you need a gluten-free version, try using gluten-free oats or a mix of the two. Each option will change the texture a bit but will still taste great.
Are No-Bake Peanut Butter Bars healthy?
No-Bake Peanut Butter Bars can be healthy in moderation. They have protein from peanut butter and fiber from oats. Honey or maple syrup adds natural sweetness. If you want them healthier, reduce the sugar or use dark chocolate chips. They make a great snack when you need energy!
You can make tasty no-bake peanut butter bars using simple ingredients. We covered everything from mixing the base to adding fun variations. These bars are easy to store and last well if kept right. Remember to check for spoilage to keep them safe. With these steps and tips, you can create bars that match your taste. Enjoy experimenting with flavors and textures to find your favorite way to make them. Get ready to share these delicious treats with friends and famil