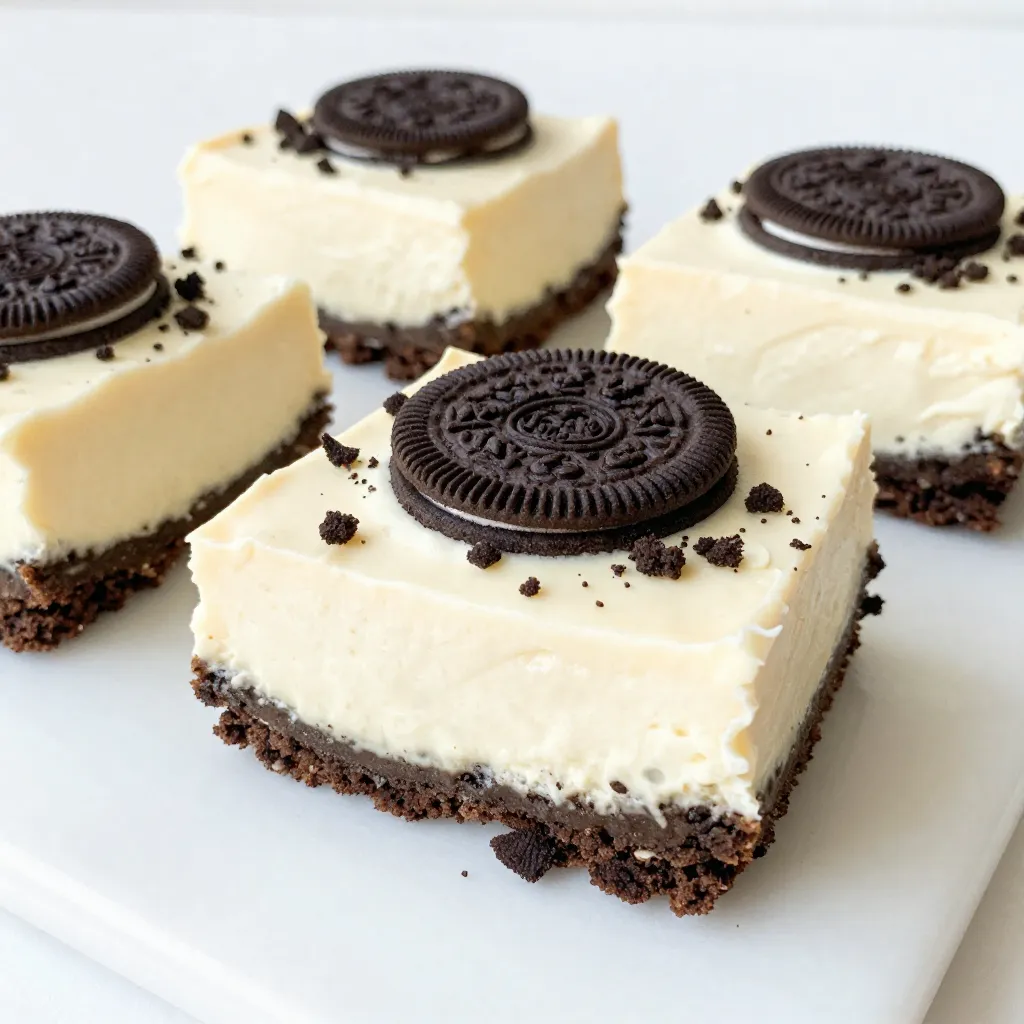
If you’re craving a sweet treat that’s easy and delicious, you’re in the right place! This No-Bake Oreo Cheesecake Bars recipe is a game changer. With just a few simple ingredients, you’ll whip up creamy bars that are sure to impress. These treats are perfect for any occasion or just to enjoy at home. Let’s dive into how you can make these irresistible delights!
Why I Love This Recipe
- Decadent Flavor: The combination of rich cream cheese and chocolatey Oreos creates an irresistible flavor that everyone will love.
- Easy to Make: With simple steps and no baking required, these cheesecake bars are a breeze to whip up, even for novice bakers.
- Perfect for Any Occasion: Whether it’s a party, potluck, or just a family dessert night, these bars are sure to impress guests and loved ones alike.
- Customizable Toppings: You can easily add your favorite toppings, like whipped cream or extra Oreos, to make them even more delightful!
Ingredients
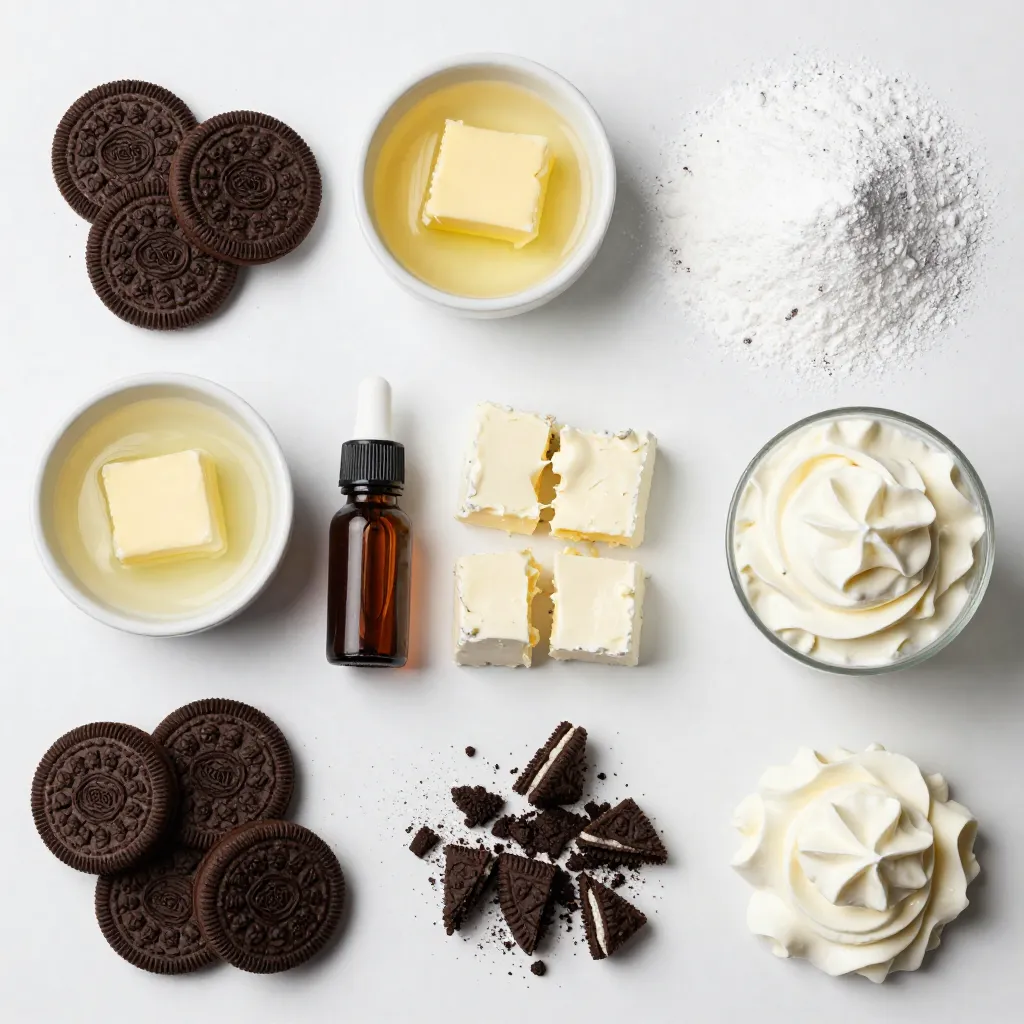
Gather all the ingredients first. This will make your baking easier and more fun. Here’s what you need:
– 24 Oreo cookies, crushed
– 4 tablespoons unsalted butter, melted
– 16 oz cream cheese, softened
– 1 cup powdered sugar
– 1 teaspoon vanilla extract
– 1 cup heavy whipping cream
– 10 Oreo cookies, chopped for filling and garnish
– Optional: whipped cream for topping
Each ingredient plays a key role. The crushed Oreos form a tasty crust. The melted butter helps bind the crust together. Cream cheese adds that smooth, creamy texture.
Powdered sugar sweetens the filling, while vanilla adds flavor. Heavy whipping cream makes the cheesecake light and fluffy. The chopped Oreos give little bursts of chocolate throughout.
If you want, top the bars with whipped cream for extra yum. These ingredients create a rich dessert that everyone loves.
Step-by-Step Instructions
Preparing the Crust
To start, grab a mixing bowl and add 24 crushed Oreo cookies. Then, pour in 4 tablespoons of melted unsalted butter. Mix well until it looks like wet sand. Next, take a 9×9 inch baking pan and press the Oreo mix firmly into the bottom. Make sure it’s even. This will be your delicious crust. Now, put the pan in the fridge while you make the filling.
Making the Cheesecake Filling
In a large bowl, take 16 oz of softened cream cheese. Use an electric mixer to beat it until smooth. Then, slowly add 1 cup of powdered sugar and 1 teaspoon of vanilla extract. Mix until everything is well combined. In a separate bowl, whip 1 cup of heavy cream until stiff peaks form. This step adds fluffiness to your cheesecake. Gently fold the whipped cream into the cream cheese mixture. Be careful not to lose the air from the whipped cream. Finally, fold in 10 chopped Oreo cookies, but save some for later.
Assembling and Chilling the Bars
Now, pour the cheesecake filling over the crust in your baking pan. Smooth the top with a spatula. Cover the pan and place it back in the refrigerator. Chill for at least 4 hours, but overnight is best for a firmer texture. Once set, remove the bars from the pan. Cut them into squares and add whipped cream on top if you like. Sprinkle the remaining chopped Oreos for a final touch. Enjoy your tasty no-bake dessert!
Tips & Tricks
Achieving the Perfect Consistency
To get a creamy texture, start with softened cream cheese. If it’s too cold, your mix will be lumpy. Beat it well until it’s smooth. When you whip the heavy cream, go until stiff peaks form. This gives your cheesecake that light, airy feel. Folding the whipped cream into the cream cheese is key. Do it gently to keep the air in.
Best Practices for Folding Ingredients
When you add the whipped cream, use a spatula. Begin at the bottom of the bowl and lift the mixture. Turn the bowl as you fold. This method helps blend without losing the fluffiness. Add the chopped Oreos only after folding in the whipped cream. This keeps the pieces intact and adds great texture.
Serving Suggestions for No-Bake Oreo Cheesecake Bars
After chilling, cut the bars into squares. A hot knife makes clean cuts. Serve with a dollop of whipped cream on top. A sprinkle of extra chopped Oreos adds a fun touch. If you want to impress, drizzle some chocolate sauce over them. They are perfect for parties or a sweet treat at home. Enjoy every bite!
Pro Tips
- Use Cold Ingredients: Ensure that your cream cheese is softened at room temperature, but keep the heavy cream cold for better whipping. This contrast in temperature leads to a fluffy filling.
- Don’t Overmix: When folding the whipped cream into the cream cheese mixture, be gentle. Overmixing can deflate the whipped cream, resulting in a denser cheesecake.
- Chill Longer for Best Results: For the best texture and flavor, allow the cheesecake bars to chill overnight. This gives them time to set properly and enhances the taste.
- Consider Using a Springform Pan: If you want to serve the cheesecake bars in a more elegant way, consider using a springform pan. It makes removing the bars easier and keeps them intact.
Variations
Adding Other Mix-Ins
You can make your No-Bake Oreo Cheesecake Bars even more fun! Try adding different mix-ins. Some great options include mini chocolate chips or crushed candy bars. You can also toss in some chopped nuts for crunch. Each mix-in adds a new layer of flavor. Just remember not to add too much, or it may change the texture.
Different Cookie Options for the Crust
While Oreos are a classic choice, you can experiment with other cookies for the crust. For example, use chocolate wafers for a deeper chocolate flavor. Graham crackers also work well if you prefer a lighter crunch. You might even try using vanilla cookies for a unique twist. Just crush them the same way you do with Oreos.
Flavor Variations for the Cheesecake
Want to change up the flavor of your cheesecake? It’s easy! For a fruity twist, you can add some lemon or lime juice to the cream cheese mixture. If you love chocolate, mix in some cocoa powder for a richer taste. You can also use flavored extracts, like almond or coconut, for a fun surprise. The possibilities are endless, so get creative!
Storage Info
How to Properly Store Leftovers
To keep your No-Bake Oreo Cheesecake Bars fresh, place them in an airtight container. This helps prevent them from drying out or absorbing other smells in the fridge. If you do not have a container, wrap the bars tightly in plastic wrap. Make sure to store them in the refrigerator for the best taste and texture.
Freezing Instructions for Longer Storage
You can freeze these cheesecake bars for later enjoyment! First, cut the bars into pieces and place them on a baking sheet. Make sure they do not touch each other. Freeze for about two hours until they are solid. Then, transfer the bars to a freezer-safe container or bag. Label it with the date for easy reference. They can last up to three months in the freezer.
Shelf Life of No-Bake Oreo Cheesecake Bars
When stored properly, the bars last about 5 days in the fridge. If you freeze them, they can stay tasty for up to three months. Just remember to thaw them in the fridge overnight before serving. This way, they maintain their creamy texture and delicious flavor. Enjoy every last bite!
FAQs
Can I make these bars ahead of time?
Yes, you can make these bars ahead of time. I often prepare them the night before. This way, they chill well and set perfectly. Just cover them tightly with plastic wrap. Keep them in the fridge until you are ready to serve. Making them ahead of time saves you stress on the day you want to enjoy them.
How long does it take for the cheesecake to set?
The cheesecake takes about four hours to set. However, if you can wait, overnight is best. Chilling them longer helps the flavors blend nicely. It also makes the bars firmer. Just be sure to cover them well to avoid fridge odors. You want to keep that fresh taste!
Can I use low-fat cream cheese or dairy alternatives?
Yes, you can use low-fat cream cheese if you prefer. It may change the texture a bit, making it lighter. Dairy alternatives like almond or soy cream work too. Just ensure they are thick enough for a good set. Experimenting with these options can lead to fun new flavors!
These no-bake Oreo cheesecake bars are easy and fun to make. You learned about the simple ingredients and the steps to create them. We explored useful tips for perfecting your bars and variations to get creative. Storing leftovers and answering common questions helps ensure your success.
I hope you feel inspired to try making these tasty treats. Enjoy every bite of your delicious creatio