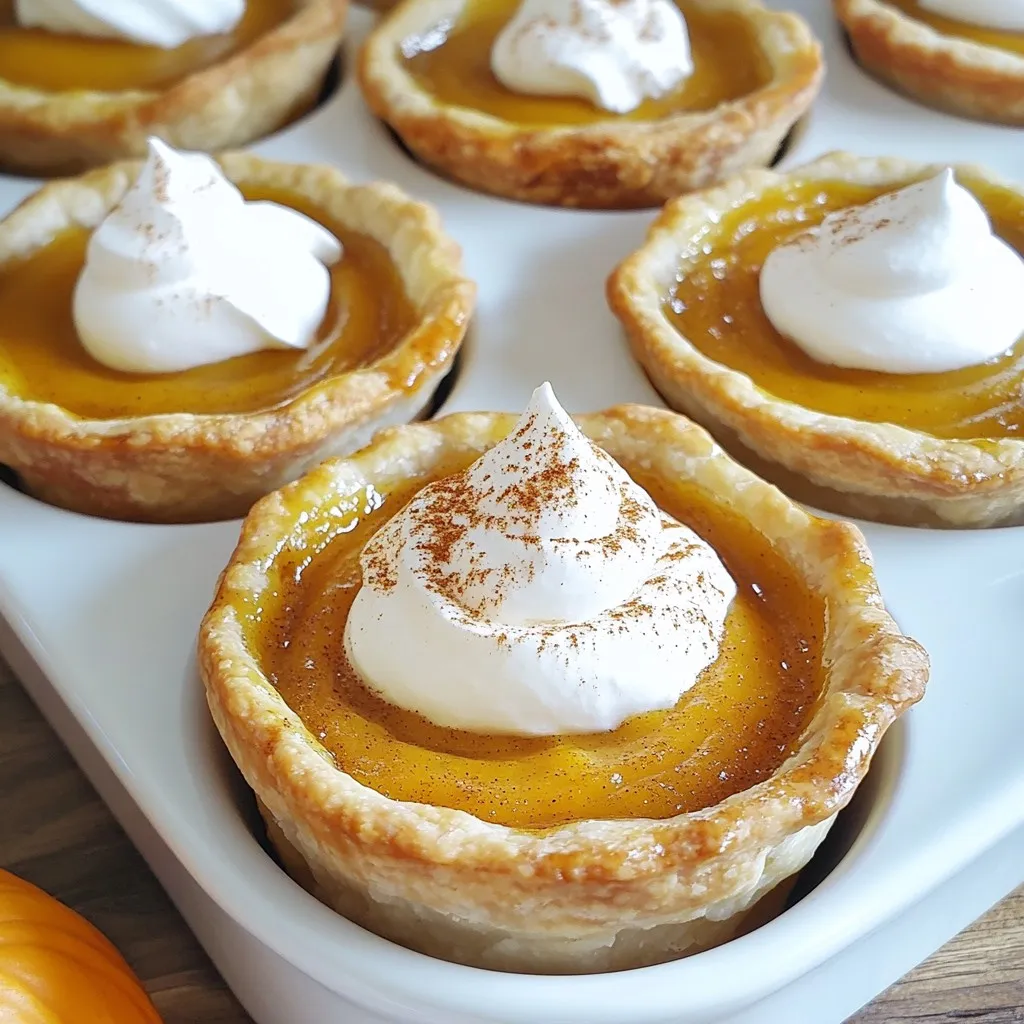
Mini pumpkin pies are the best fall treat! They’re small, cute, and packed with flavor. In this post, I’ll guide you through making these sweet bites using simple ingredients like canned pumpkin and pie crusts. You can whip them up in no time and impress your friends and family. Ready to bake? Let’s dive in and create some festive fun!
Why I Love This Recipe
- Perfect for Fall: These mini pumpkin pies capture the essence of autumn with their warm spices and cozy flavors.
- Easy to Make: With pre-made pie crusts and simple ingredients, you can whip these up in no time!
- Great for Sharing: The mini size makes them perfect for parties or gatherings; everyone can enjoy their own pie.
- Deliciously Customizable: Add your favorite toppings or spices to make them uniquely yours!
Ingredients
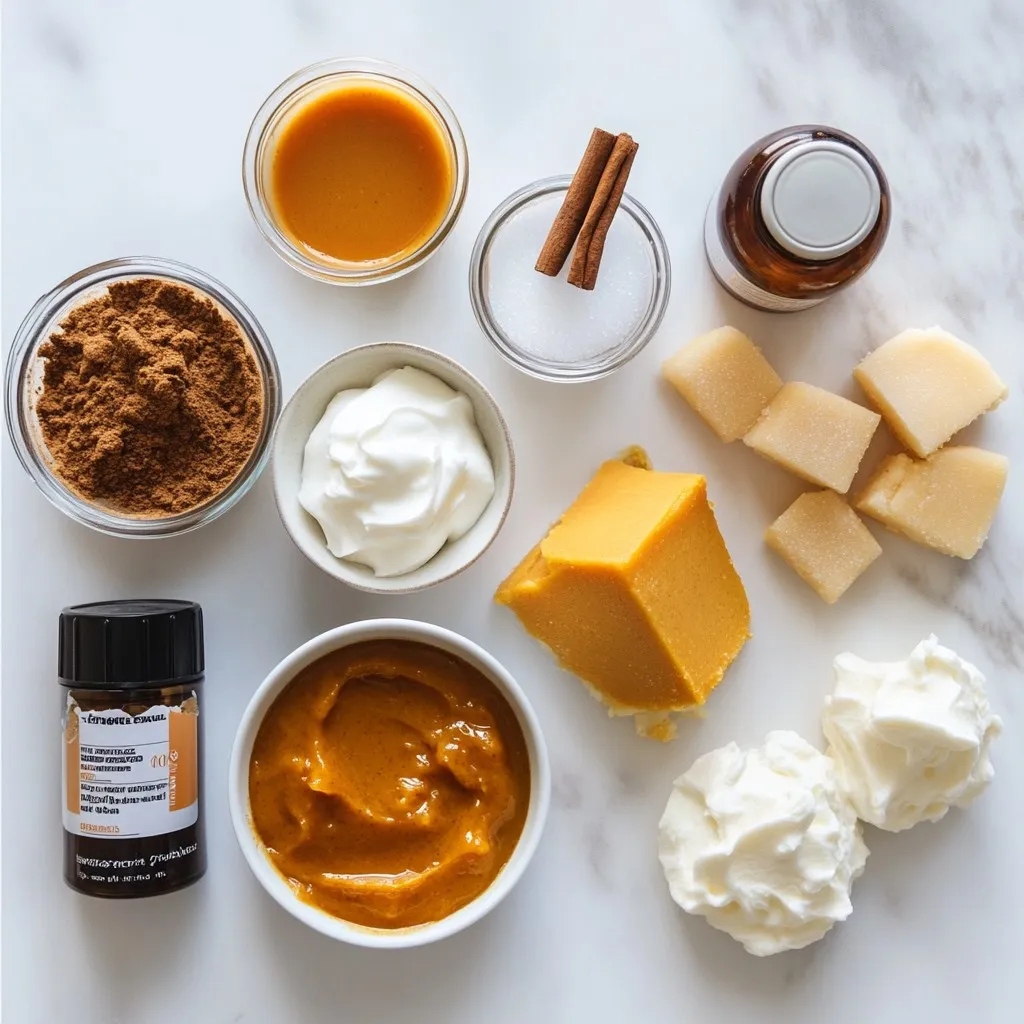
To make mini pumpkin pies, you need simple and tasty ingredients. Here’s what you will need:
– 1 cup canned pumpkin puree
– 1/2 cup evaporated milk
– 1/3 cup brown sugar
– 1/4 cup granulated sugar
– 1 large egg
– 1 teaspoon pumpkin pie spice
– 1/2 teaspoon vanilla extract
– 1/4 teaspoon salt
– 1 package of pre-made pie crusts (usually contains 2 crusts)
– Whipped cream (for serving)
– Cinnamon (for garnish)
Each ingredient plays a key role in flavor and texture. Canned pumpkin puree gives a rich taste and smooth texture. Evaporated milk adds creaminess, while sugars sweeten the mixture just right. The large egg helps bind everything together.
Pumpkin pie spice adds that warm, cozy flavor we all love in fall. Vanilla extract enhances the sweetness, and salt balances flavors. The pie crusts hold the filling and create a nice crunch. Lastly, whipped cream and cinnamon make the pies look and taste festive.
Gather these ingredients, and you’re ready for a fun cooking experience!
Step-by-Step Instructions
Prepping the Oven and Crusts
– Preheat the Oven
Start by preheating your oven to 425°F (220°C). This temperature helps the pies bake quickly and evenly.
– Prepare Pie Crusts
Roll out your pie crust on a floured surface. Use a round cookie cutter or a cup to cut out circles about 4 inches wide. This size will fit perfectly into a muffin tin. Press each circle gently into the muffin cups to form small pie shells. Don’t forget to prick the bottoms with a fork. This step stops the crusts from bubbling up.
Making the Pumpkin Filling
– Combining Ingredients
In a large mixing bowl, add 1 cup of canned pumpkin puree, 1/2 cup of evaporated milk, 1/3 cup of brown sugar, 1/4 cup of granulated sugar, 1 large egg, 1 teaspoon of pumpkin pie spice, 1/2 teaspoon of vanilla extract, and 1/4 teaspoon of salt.
– Mixing Techniques
Use a whisk or a wooden spoon to mix until everything is smooth and well combined. You want a nice, creamy filling for your pies.
Baking and Cooling
– Pouring Filling into Crusts
Carefully pour the pumpkin filling into each pie crust. Fill them about 3/4 full to allow space for the filling to rise.
– Baking Instructions
Place the muffin tin in the preheated oven. Bake for 15 to 20 minutes. Check if the filling is set by inserting a toothpick. It should come out clean when they are done.
– Cooling Process
Once baked, take the muffin tin out of the oven. Let the mini pies cool for about 10 minutes. Gently remove them from the tin. You can serve them warm or at room temperature.
Tips & Tricks
Perfecting the Mini Pumpkin Pies
Avoiding Soggy Bottoms
To keep the crust crisp, poke holes in the bottom. This step helps steam escape. You can also bake the crust for five minutes before filling. This short bake firms up the crust. Use a pre-made crust for ease and speed.
Ensuring Even Baking
Place the muffin tin in the center of the oven. This helps the heat reach all pies evenly. Rotate the tin halfway through baking. This ensures all pies bake at the same rate. Keep an eye on them during the last few minutes. You want the filling set but not overcooked.
Serving Suggestions
Whipped Cream and Garnish Ideas
Top each pie with a generous dollop of whipped cream. A sprinkle of cinnamon adds a nice touch. You can also use nutmeg or pumpkin spice for extra flavor. Fresh mint leaves can brighten up the look too.
Pairing with Beverages
Enjoy your mini pumpkin pies with hot cider or coffee. A spiced chai complements the flavors well. For a festive twist, try them with pumpkin ale. Each drink enhances the warm spices in the pie.
Presentation Ideas
Creative Plating
Arrange the pies on a colorful platter. You can use autumn leaves or small pumpkins as decor. This creates a cozy fall vibe. Place pies in muffin liners for an easy grab-and-go option.
Using Decorative Toppings
Try drizzling caramel sauce over the tops. A few pecans or almonds add crunch. Edible flowers can make your dessert pop with color. Get creative with how you present your treats!
Pro Tips
- Chill the Dough: Refrigerate the pie crust for at least 30 minutes before rolling it out. This helps to keep the crust flaky and prevents it from shrinking during baking.
- Use Fresh Pumpkin Spice: For a more robust flavor, consider using freshly ground spices instead of pre-mixed pumpkin pie spice. This can enhance the overall taste of your mini pies.
- Check for Doneness: Since ovens can vary, start checking your mini pies at the 15-minute mark. They are done when the filling is set and a toothpick comes out clean.
- Garnish Creatively: Elevate your presentation by adding a sprinkle of nutmeg or a drizzle of caramel sauce along with the whipped cream for a delightful twist.
Variations
Healthier Alternatives
You can make mini pumpkin pies healthier with a few simple swaps.
– Using Low-Sugar or Sugar Substitutes: Try using stevia or monk fruit sweetener. These options cut calories but keep the sweet taste. You can use half the amount of these substitutes as you would sugar. This change lets you enjoy your pie without the extra sugar rush.
– Dairy-Free Options: Swap the evaporated milk for coconut milk or almond milk. Both will give your pies a rich taste without dairy. This is great for those who are lactose intolerant or choose a vegan diet.
Flavor Variations
You can make your mini pumpkin pies even more exciting with unique flavors.
– Adding Chocolate or Nutmeg: A little chocolate can go a long way. Mix in mini chocolate chips for a sweet surprise. You can also sprinkle in nutmeg for an extra spice kick. Nutmeg adds warmth and depth to the flavor.
– Incorporating Nuts: Chopped pecans or walnuts can add a nice crunch. Just sprinkle a few on top of the filling before baking. They bring a delightful texture to each bite.
Crust Alternatives
The crust can change your mini pumpkin pie game.
– Gluten-Free Pie Crust Options: If you need a gluten-free crust, look for pre-made options made from rice flour or almond flour. These can hold the filling well and taste great.
– Cookie Crust Ideas: For a fun twist, use crushed ginger snaps or graham crackers mixed with melted butter. This adds a sweet and spicy flavor that pairs well with pumpkin. Just press the mixture into the muffin tin for a tasty base.
Storage Info
Storing Leftover Mini Pumpkin Pies
To keep your mini pumpkin pies fresh, store them properly. First, let the pies cool completely.
– Refrigeration Guidelines
Place the mini pies in an airtight container. You can also cover them with plastic wrap. Store them in the fridge for up to four days. This keeps the pies moist and tasty.
– Freezing Instructions
For longer storage, freeze the mini pies. Wrap each pie in plastic wrap, then in foil. Place them in a freezer bag. They can last up to three months in the freezer. To enjoy, thaw them in the fridge overnight.
How Long Do They Last?
Understanding how long your pies last helps avoid waste.
– Shelf Life Overview
Mini pumpkin pies can last in the fridge for four days. If you freeze them, they remain good for up to three months.
– Signs of Spoilage
Check for any signs of spoilage before eating. Look for a strange smell, discoloration, or mold. If you notice any of these, it is best to throw the pies away. Keeping an eye on your pies ensures safe and tasty treats.
FAQs
How do I know when my mini pumpkin pies are done?
You can tell your mini pumpkin pies are done by checking the filling. Insert a toothpick in the center of a pie. If it comes out clean, the pies are ready. The filling should also look set and firm, not jiggly. It usually takes about 15 to 20 minutes in the oven.
Can I use fresh pumpkin instead of canned?
Yes, you can use fresh pumpkin. Start by choosing a sugar pumpkin, also called a pie pumpkin. Cut it in half and scoop out the seeds. Roast the halves cut-side down until soft. Once cool, scoop out the flesh and blend it until smooth. Use this in place of canned puree in your recipe.
Where can I buy pre-made mini pumpkin pies?
You can find pre-made mini pumpkin pies at many grocery stores. Look for them in the frozen section or the bakery. Stores like Walmart, Costco, and Trader Joe’s often carry them. Local bakeries may also offer fresh mini pies during the fall season.
In this blog post, we explored how to make delicious mini pumpkin pies. We covered ingredients like pumpkin puree and spices, along with step-by-step instructions. I shared tips for perfect pies and variations to suit your taste. You can even find advice on storing leftovers.
Now, you have all the tools to impress friends and family. Enjoy your baking adventur