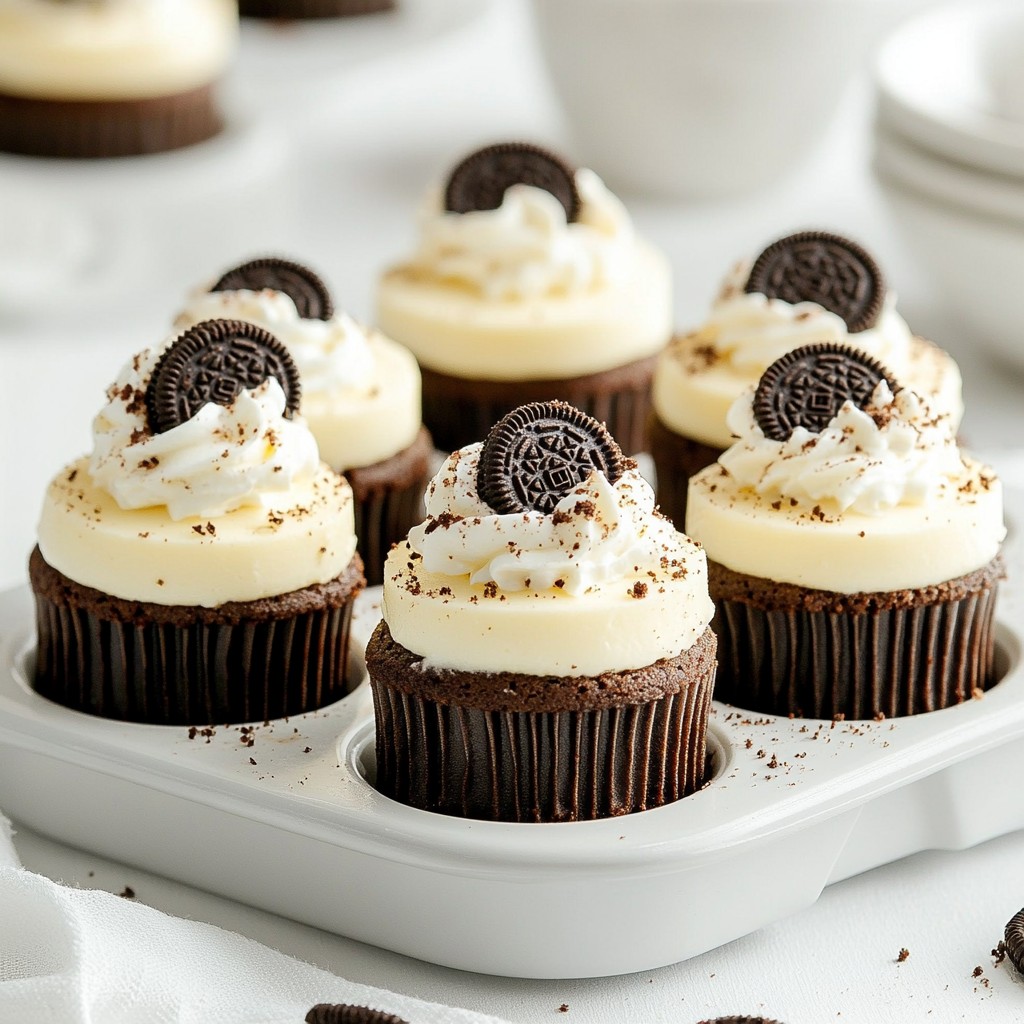
If you crave a sweet treat that’s easy to make and utterly delicious, you've found it. These Mini Oreo Cheesecakes are the perfect dessert for any gathering or a cozy night in. With just a few simple ingredients, you'll create a rich, creamy dessert topped with crunchy Oreo goodness. Let’s dive into this delightful recipe that will impress your friends and satisfy your sweet tooth!
Why I Love This Recipe
- Irresistible Flavor: These mini cheesecakes combine the rich taste of cream cheese with the chocolatey crunch of Oreos, creating a dessert that’s hard to resist.
- Easy to Make: This recipe is simple and straightforward, making it perfect for both novice and experienced bakers alike.
- Perfect Portions: Mini cheesecakes are just the right size for a sweet treat, allowing you to enjoy without overindulging.
- Customizable Topping: You can easily personalize these cheesecakes with your favorite toppings, whether it’s whipped cream, chocolate sauce, or extra Oreo crumbs.
Ingredients
Main Ingredients
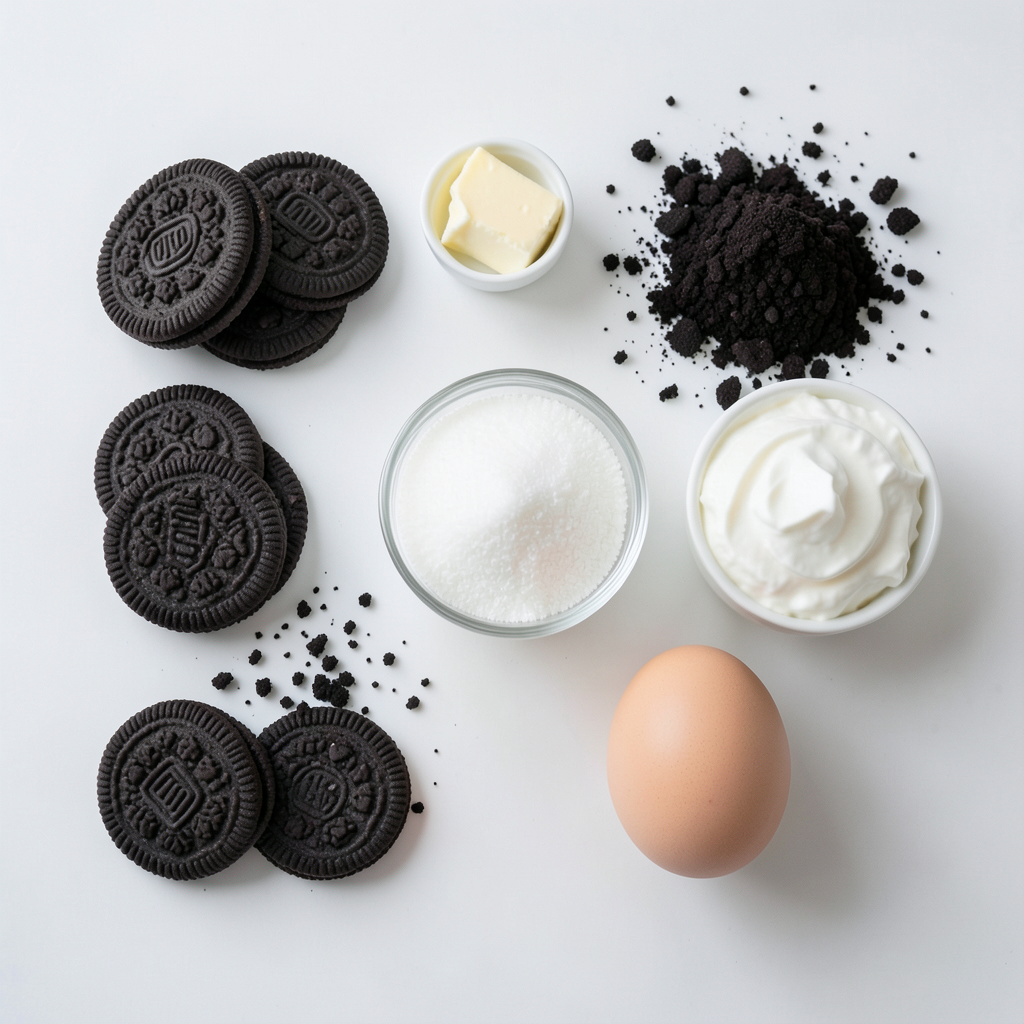
- 18 Oreo cookies (9 for crust, 9 for filling)
- 2 tablespoons unsalted butter, melted
- 8 oz cream cheese, softened
- 1/2 cup granulated sugar
- 1 teaspoon vanilla extract
- 1/4 cup sour cream
- 1 large egg
- Pinch of salt
- Whipped cream for topping (optional)
- Additional Oreo crumbs for garnish
You need just a few simple ingredients for these Mini Oreo Cheesecakes. First, grab 18 Oreo cookies. You will use nine for the crust and nine for the filling. Crush the cookies into fine crumbs to make a tasty base. Next, you need 2 tablespoons of melted unsalted butter to help hold the crust together.
For the filling, you will need 8 ounces of softened cream cheese. This gives the cheesecake its rich and creamy texture. Combine it with 1/2 cup of granulated sugar for sweetness. Don’t forget 1 teaspoon of vanilla extract for flavor and 1/4 cup of sour cream to add a bit of tang.
One large egg brings everything together, and a pinch of salt balances the sweetness. For serving, whipped cream on top makes it look fancy. You can also sprinkle extra Oreo crumbs for that extra flair.
Equipment Needed
- Muffin tin
- Paper liners
- Mixing bowls
- Electric mixer
To make these cheesecakes, you need a muffin tin. This will shape the mini desserts perfectly. Use paper liners to make removal easy after baking. Mixing bowls are essential for combining your ingredients, and an electric mixer will help you get a smooth filling.
Step-by-Step Instructions
Preheating and Crust Preparation
- Preheat the oven to 325°F (160°C).
- Crush 9 Oreos into fine crumbs and mix with melted butter.
First, I set my oven to preheat. This helps the cheesecakes bake evenly. Next, I take 9 Oreos and crush them into tiny crumbs. You can use a rolling pin or a food processor for this. Then, I mix the crumbs with 2 tablespoons of melted butter. This mixture will form a tasty crust.
Forming the Cheesecake Cups
- Line muffin tin with paper liners and create the crust.
Now, I line a muffin tin with paper liners. This step is key for easy removal later. I take my Oreo crumb mix and press it into the bottom of each liner. I make sure to press it down firmly. This creates a solid base for the cheesecake.
Preparing the Cheesecake Filling
- Beat cream cheese until smooth, add sugar, vanilla, sour cream, and incorporate egg.
Next, I grab a large mixing bowl and add 8 oz of softened cream cheese. I use an electric mixer to beat it until smooth. Then, I slowly add in 1/2 cup of sugar, 1 teaspoon of vanilla extract, and 1/4 cup of sour cream. I mix well until everything is combined. Finally, I add in 1 large egg and a pinch of salt. I mix just enough to combine. Over-mixing can make the filling tough.
Baking the Mini Cheesecakes
- Fill crust with cheesecake mixture and bake for 20-25 minutes.
I carefully spoon the cheesecake filling over the crusts. I fill each cup about 3/4 full. Then, I place the muffin tin in the preheated oven. I bake the cheesecakes for about 20 to 25 minutes. They should be set but still a bit jiggly in the center. This ensures they are creamy and delicious.
Cooling and Serving Suggestions
- Cool at room temperature and refrigerate before serving.
After baking, I take the cheesecakes out of the oven. I let them cool at room temperature for about 30 minutes. Then, I move them to the fridge to chill for at least 2 hours. This step is important for the best taste. Before serving, I like to top them with whipped cream and extra Oreo crumbs for a fun touch.
Tips & Tricks
Ensuring the Perfect Texture
To make your mini Oreo cheesecakes creamy, avoid over-mixing the egg. Mix just until you can no longer see the egg. This keeps the texture smooth and rich.
Helpful Baking Tips
I recommend using a water bath for even cooking. This keeps the heat steady and helps the cheesecakes bake evenly. If you want to try it, place your muffin tin in a larger pan. Fill the larger pan with hot water before baking.
Presentation Ideas
For a lovely touch, top your cheesecakes with whipped cream. A sprinkle of extra Oreo crumbs adds texture and looks nice too. These small details make your mini cheesecakes shine!
Pro Tips
- Chill for Best Texture: Allow the mini cheesecakes to chill in the refrigerator for at least 2 hours, or overnight if possible. This will enhance the texture and flavor.
- Mixing Tips: When adding the egg, mix just until incorporated to avoid overmixing. This helps prevent cracks in your cheesecakes.
- Crust Consistency: Ensure your Oreo crumbs are finely crushed and mixed well with melted butter for a firm crust that holds together.
- Garnishing Ideas: Get creative with toppings! Besides whipped cream and Oreo crumbs, consider adding chocolate sauce or fresh berries for extra flavor.
Variations
Flavor Variations
You can easily change the flavors of your mini cheesecakes. Adding peppermint extract brings a festive twist. Just a few drops will do. You can also swirl in chocolate or caramel sauce. This adds a rich flavor and a fun look. Use a toothpick to create swirls in the filling.
Dietary Modifications
Want to make these cheesecakes fit your diet? You can use gluten-free Oreos. This makes them safe for those with gluten issues. For a vegan option, swap in plant-based cream cheese. It tastes great and works well in this recipe. You can enjoy these treats no matter your dietary needs!
Storage Info
Refrigeration Guidelines
Store your Mini Oreo Cheesecakes in an airtight container in the refrigerator. This keeps them fresh and tasty. They last about 4 to 5 days. Make sure the container is sealed tight to avoid any odors. If you want to enjoy them later, refrigeration is key.
Freezing Instructions
You can freeze Mini Oreo Cheesecakes for longer storage. Freeze them right after cooling. Place them in a single layer in a freezer-safe container. Use parchment paper between layers to prevent sticking. They can stay in the freezer for up to 3 months. When ready to eat, move them to the fridge to defrost overnight. This keeps their creamy texture. Enjoy them as a quick treat anytime!
FAQs
Can I use other cookies for the crust?
Yes, you can use other cookies for the crust. Some great options include:
- Chocolate sandwich cookies
- Graham crackers
- Digestive biscuits
- Vanilla wafers
These cookies will give a different flavor but still work well. Just crush them like you do with Oreos and mix with melted butter.
How long can Mini Oreo Cheesecakes be stored?
You can store Mini Oreo Cheesecakes in the fridge for up to 5 days. Keep them in an airtight container. This helps keep them fresh and tasty. If you see any signs of spoilage, it's best to toss them out.
Can I make Mini Oreo Cheesecakes ahead of time?
Yes, you can make these mini cheesecakes ahead of time. They are great for parties or gatherings! Bake them a day or two in advance. Just store them in the fridge until it's time to serve. This way, you can enjoy your event without stress.
This post covered how to make delicious Mini Oreo Cheesecakes. You learned about the main ingredients, the equipment needed, and step-by-step instructions. I shared tips for perfect texture and presentation ideas, along with tasty variations. Remember, these treats are easy to customize and store well.
Now, you can impress friends and family with your baking skills. Enjoy the process and have fun making these treats! They are sure to delight everyone who tries them.