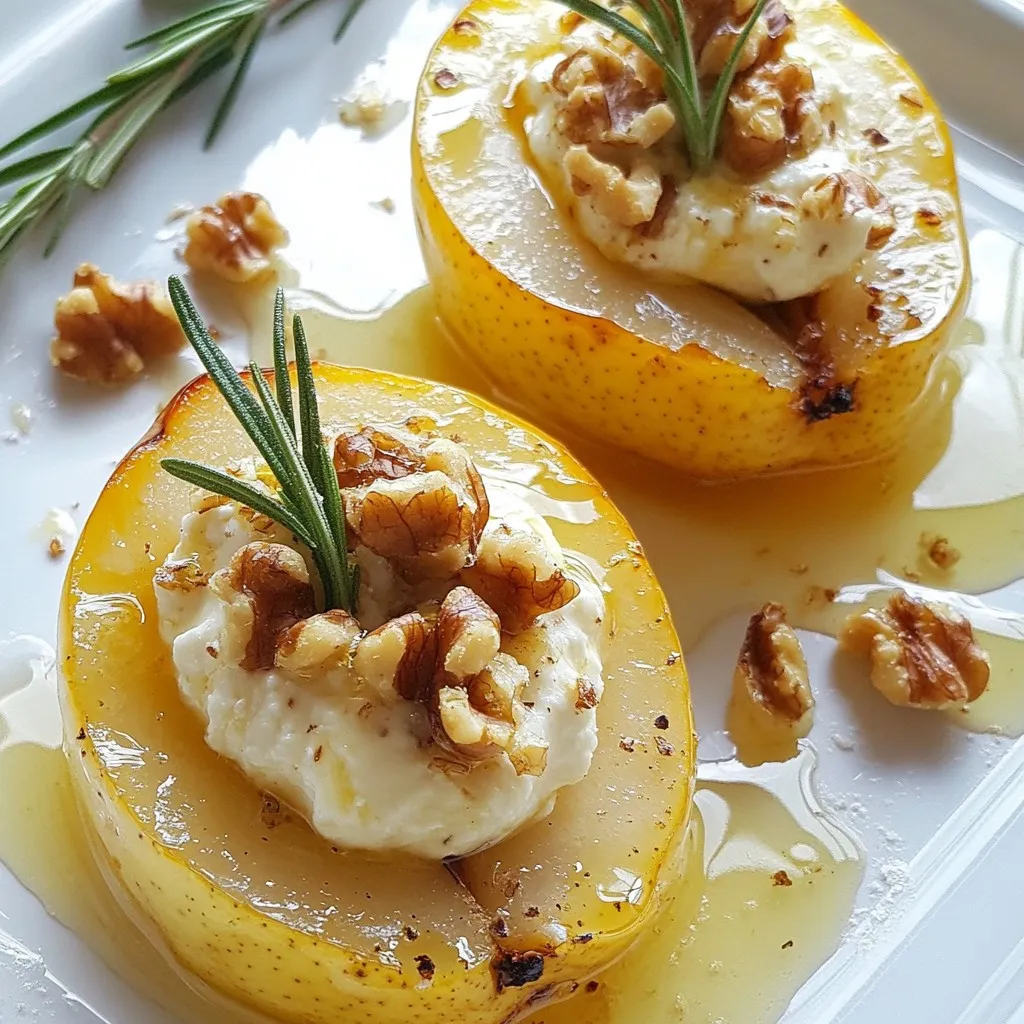
Are you ready to impress your guests with a simple yet elegant dish? Baked Pears with Goat Cheese blend sweet and savory flavors for a delightful treat. This recipe is straightforward and requires minimal ingredients you likely have at home. From choosing ripe pears to serving suggestions, I will guide you step-by-step to create this mouthwatering dish. Let’s get started on making your next favorite dessert!
Why I Love This Recipe
- Delicious Combination: The sweet, juicy pears pair beautifully with the creamy, tangy goat cheese for a delightful flavor experience.
- Easy to Prepare: With just a few simple steps, this recipe comes together quickly, making it perfect for both weeknight dinners and special occasions.
- Healthier Indulgence: This dish provides a healthier dessert option, using natural sweetness from the pears and honey, along with nutritious walnuts.
- Beautiful Presentation: The baked pears are not only tasty but also visually stunning, making them a standout centerpiece for any table.
Ingredients
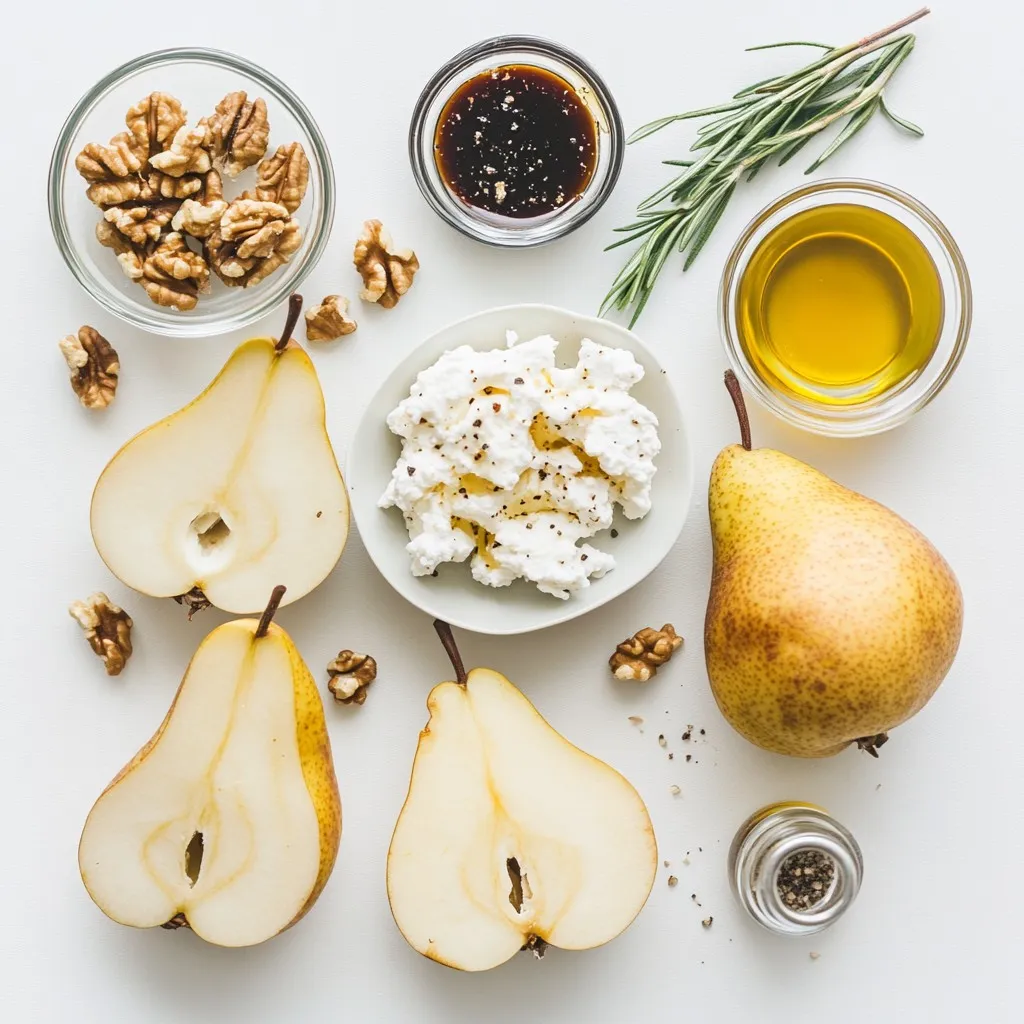
List of Ingredients
– 4 ripe pears, halved and cored
– 6 oz goat cheese, softened
– 1/4 cup walnuts, chopped
– 2 tablespoons honey
– 1 teaspoon fresh rosemary, finely chopped
– 1 teaspoon balsamic vinegar
– 1 tablespoon olive oil
– Salt and pepper to taste
Gathering fresh ingredients makes a big difference. You want ripe pears for this recipe. Look for pears that yield slightly when you press them. The goat cheese should be creamy and soft. This helps it blend well with other ingredients.
Next, walnuts add a nice crunch. Chop them finely so they mix well. Honey gives the dish sweetness. You can adjust the amount based on your taste. Fresh rosemary adds a lovely aroma. Use a teaspoon for a subtle hint.
Balsamic vinegar brings a tangy flavor. A teaspoon is all you need. Olive oil helps with cooking and adds richness. Finally, salt and pepper enhance all the flavors. Use these to taste, but don’t overdo it.
This list of ingredients will help you make a delicious dish. Each item plays a key role in flavor and texture. Enjoy the process of gathering and preparing them!
Step-by-Step Instructions
Preparation Steps
1. Preheating the oven
Start by preheating your oven to 375°F (190°C). This helps the pears cook evenly.
2. Preparing the filling
In a mixing bowl, combine 6 oz of softened goat cheese, 1/4 cup of chopped walnuts, 1 teaspoon of finely chopped fresh rosemary, and 1 teaspoon of balsamic vinegar. Add a pinch of salt and pepper. Mix until smooth.
3. Arranging the pears in the baking dish
Take 4 ripe pears, cut them in half, and remove the core. Place the pear halves cut side up in a baking dish. Drizzle 1 tablespoon of olive oil over them to add flavor and prevent sticking.
Baking Process
1. Initial covered baking
Fill each pear half generously with the goat cheese mixture. Drizzle 2 tablespoons of honey over the filled pears. Cover the baking dish tightly with aluminum foil. Bake for 20 minutes.
2. Final uncovered baking
After 20 minutes, remove the foil. Bake for an additional 10 to 15 minutes until the pears are tender and the cheese is golden.
Serving Suggestions
1. Allowing cooling time
Let the baked pears cool slightly before serving. This allows the flavors to settle.
2. Presentation tips
Serve the warm pears on a nice platter. Garnish with extra chopped walnuts and a drizzle of honey. Add a sprig of fresh rosemary for a lovely touch. Enjoy your beautiful dish!
Tips & Tricks
Selecting Ripe Pears
When you choose pears, look for a few signs. Ripe pears should feel slightly soft when you press them gently. Their color should be rich and vibrant. Avoid pears with brown spots or wrinkles.
Store your pears at room temperature for a few days. This allows them to ripen nicely. Once ripe, keep them in the fridge to slow down the ripening process until you’re ready to bake.
Choosing Quality Goat Cheese
Goat cheese comes in different styles. Fresh goat cheese is creamy and tangy. Aged goat cheese has a firmer texture and bolder flavor. Look for cheese that smells fresh and has a smooth surface.
For this recipe, I recommend using creamy goat cheese for a rich taste. It pairs well with the sweet pears and crunchy walnuts.
Enhancing Flavor
To kick up the flavor, consider adding spices. Cinnamon or nutmeg can add warmth to your dish. Fresh herbs like thyme or basil can also bring a fresh twist.
If you want to swap out honey, try maple syrup or agave nectar. Both add a sweet touch without overpowering.
Pro Tips
- Choose the Right Pears: Select ripe but firm pears, such as Bosc or Bartlett, for the best texture and flavor when baked.
- Experiment with Cheeses: If you’re not a fan of goat cheese, try using feta or ricotta for a different flavor profile.
- Serve with Accompaniments: Pair the baked pears with a side of arugula salad or crackers to enhance the dish’s presentation and balance the flavors.
- Make Ahead: Prepare the goat cheese mixture ahead of time and refrigerate it. Assemble and bake the pears just before serving for a warm treat.
Variations
Vegetarian Options
You can easily make this dish vegetarian. If you want a different taste, try using ricotta or feta cheese instead of goat cheese. Both options provide a creamy texture. You can also add fruits like cranberries or figs for sweetness. A sprinkle of cinnamon or nutmeg adds warmth and spice.
Gluten-Free Adaptations
This baked pears recipe is naturally gluten-free. Just check that all your ingredients are gluten-free. For a crunchy topping, try using gluten-free granola or crushed nuts. This will add a lovely texture to the dish.
Seasonal Twists
You can change this recipe with seasonal fruits. In fall, use apples instead of pears. In summer, try peaches or plums. Each fruit brings a new flavor. Adjust the honey amount for different fruits. This keeps the dish fresh and exciting throughout the year.
Storage Info
Storing Leftovers
To keep your baked pears fresh, let them cool down first. Place them in an airtight container. This helps prevent moisture loss or spoilage. I suggest using glass or plastic containers with lids. This way, you keep the flavor and texture intact. Enjoy your leftovers within three days for the best taste.
Reheating Tips
You can reheat your baked pears easily. For the microwave, place them on a plate. Heat them for 30 seconds. Check if they are warm enough. If not, try another 15 seconds. For the oven, preheat it to 350°F (175°C). Place the pears in a baking dish. Cover them with foil to keep them moist. Heat for about 10 minutes. This method helps retain the flavors while warming them.
Freezing Options
If you want to save baked pears for later, freezing is a great option. Wrap each pear tightly in plastic wrap. Then, place them in a freezer-safe bag or container. Try to remove as much air as possible. This prevents freezer burn. When you’re ready to eat, thaw them in the fridge overnight. Reheat them as mentioned before for the best flavor. Enjoy your tasty treat anytime!
FAQs
Can I use other fruits instead of pears?
Yes, you can use apples or peaches. These fruits also bake well. Apples give a nice crunch, while peaches add sweetness. Both pair nicely with goat cheese. Try different fruits to find your favorite!
How do I know when the pears are ripe enough?
Ripe pears feel slightly soft when squeezed. The skin should be smooth and free of blemishes. A yellow hue often indicates ripeness. If they are too hard, let them sit at room temperature for a few days.
What can I serve with baked pears and goat cheese?
Baked pears pair well with many dishes. Serve them with a fresh salad for balance. You can add grilled chicken or steak for protein. A glass of white wine enhances the flavors too. Don’t forget some crusty bread to soak up the honey!
How long do baked pears last in the fridge?
Baked pears last about three to four days in the fridge. Store them in an airtight container to keep them fresh. Reheat them in the oven for the best flavor. Enjoy them warm for a delightful treat!
This blog post covered baked pears with goat cheese. We explored key ingredients, step-by-step instructions, and tips to enhance your dish. You can also try variations, like gluten-free options or seasonal twists. Proper storage methods help keep leftovers fresh. By following this guide, you’ll impress your guests and enjoy a tasty treat. Trust your skills in the kitchen, and have fun experimenting with flavors that you lov